Monday 29 September 2008

De-seaming progress

A bit more progress on the de-seaming of the rear this weekend. I've got 50% of the seam cutoff and welded up, just the other 50% to do and then the filling and prepping.

I plan on doing a more detailed post about this in the future, but briefly here's what's involved in deseaming a mini:


  1. Start from one end of the seam and cut off 6 inches of the seam using a cutting disc in a grinder. Do not cut off any more than 6 inches at this stage!

  2. Use a sanding disc in the grinder to smooth the stubs left from the seam until they are pretty much flush with the panel.

  3. You will now see 3 edges of steel, which you must carefully butt weld together. Pulse the welder and planish the welds with a planishing hammer after every pulse to avoid distorting the panel

  4. Once you have welded the 6 inches up, start again by cutting the next 6 inches away and welding as before.

  5. Continue this until you have removed and welded the entire seam

  6. Use a sanding disc on a grinder to sand the welds smooth, fill any additional holes with weld as you find them

  7. Use filler (bondo) / lead to smooth over the welds where the seam used to be and prepare for painting


You need to do this very slowly and carefully to ensure that everything stays straight, and on no account cut the entire seam off in one go, otherwise your Mini will spring apart!

One of the problems I'm facing on my car is that when I removed the lip for the rear bumper the panels did not meet up; at the ends they were OK but in the centre the gap was as much as 5mm between the panels. Good old Austin build quality!

Thursday 25 September 2008

Rear brakes - success!

My new tool arrived for fitting the e-clips on the rear brakes of the mini so I could finally get them built up.

Thankfully fitting the clips with the tool proved a to be a piece of cake, unlike trying to do it without it!

First you fit the e-clip to the tool, above the cone.


Next, you screw the tool into the brake line thread on the wheel cylinder and then tighten the nut on the tool. This forces the cup down over the cone, thus expanding the e-clip.


Keep tightening the nut and the clip gets forced over the wheel cylinder until it snaps into place in the groove on the cylinder.


Finally unscrew the tool from the brake line thread. Job done!

Sunday 21 September 2008

OS Rear Seatbelt Mount

Not much progress on the Mini this week, despite the sun, thanks to combined holiday and girlfriends birthday.

I did manage to get some work done on the rear seatblet mount which was a complete mess. Somebody had previusly bodged a repair to the rear wheelarch which had left the seatbelt mount in a dangerous state.


First I cut out a large portion of the damaged seat base


And then I welded in lots of new metal. I also had to seam weld the wheelarch in since the previous bodger had only tack welded it in!


Thursday 11 September 2008

Rear wheel cylinders

My new rear wheel cylinders arrived today, so I'd hoped to make a start in building up the rear brake backplates.

I hit a snag however. The rear wheel cylinders are held in place by circlips (e-clips actually) and they are practically impossible to fit.

I discovered that there's a special tool available to make fitting these easy, so I've ordered one. Hopefully things will go easier once that arrives...

Here's a picture of the nightmare e clip.

Wednesday 10 September 2008

Passenger floorpan finished

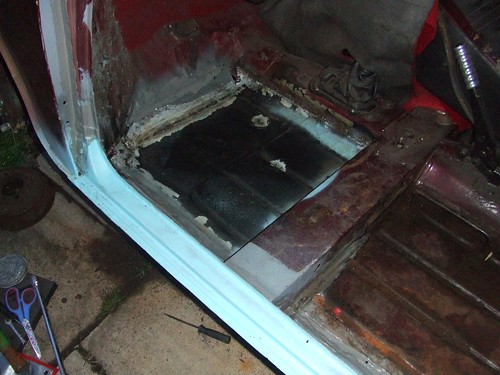
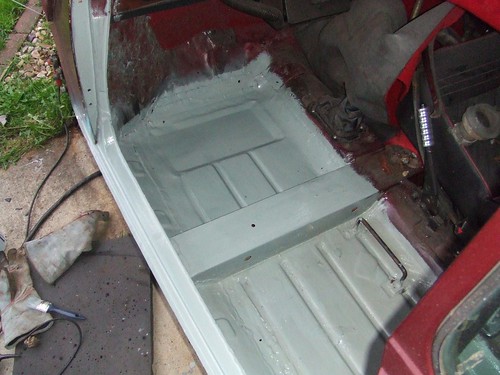
I got the passenger floorpan finished and painted tonight - just the seam sealing to do, but I need to do the whole underside so I'll do that all at once.

That marks the end of the nearside, next job - the offside!

Floorpan welded in

Floorpan finished

Tuesday 9 September 2008

Passenger floorpan

Well I spoke too soon on my last post (about working outside). Just after posting that I went out and did a couple of hours on the passenger floorpan, half way through welding though the skies opened and absolutely soaked me, my welder (switched on :-S), all of my tools and the car.

I was pretty annoyed to say the least. In fact I threw my angle grinder as hard as I could at the car and then sat in the garden in the rain sulking for half an hour.

I've calmed down a bit now thankfully and got the passenger floorpan finished last night. It took quite a bit of welding as I also had to tidy up the area around the inner wing and the transmission tunnel. Once again it was too dark to take photos by the time I'd finished but I'll try to take some tonight.

That should mean that the nearside of the car is now finished. Next job is to start the offside, which is going to need at east as much work...

Saturday 6 September 2008

Restoring cars outdoors

Rebuilding a car outside can be a bit of a nightmare. For one thing, when you finish working you have to pack everything away and tidy up. For me that means dragging the welder and huge gas bottle to the shed, tidying all of my tools awy (and cleaning them) and then sweeping up. Plus you have to re-assemble any bits of the car you've taken apart (like the doors).

Added to that, it rains CONSTANTLY in England. That means work which looked nice and shiny and new one day starts to rust the next, and you often can't get much paint on things because of the damp.

Having said that, it is possible so long as you plan ahead and don't just strip the car down to nothing in one go.

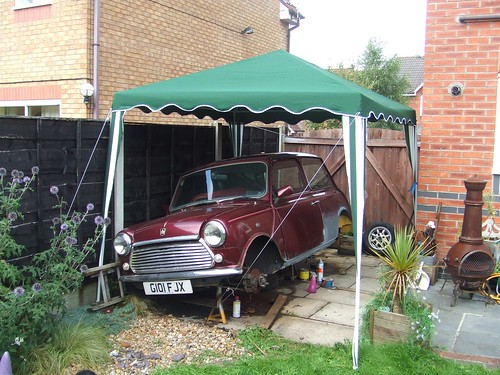
To make my life a little more bearable I put the Mini in a gazebo today. Let see how it goes...


Gazebo

Friday 5 September 2008

Yes, I am sad

I have my Mini rebuild planned in Microsoft Project.

Thursday 4 September 2008

Floor and deseaming progress

After a few days of torrential rain I finally managed toget a bit of work done on the Mini tonight.

The front NS floor is now readyto go in, the repair panel took a lot of cutting to fit and I had to repair the lower front subframe moutning first. I should get the floorpan welded in tomorrow if the weather stays OK.

I also got another 6 inches of the rear bumper deseamed tonight.

No pictures today though as it was too dark to take any by the time I'd finished! (8:30pm - nights are drawing in...)

Tuesday 2 September 2008

Front NS Floors

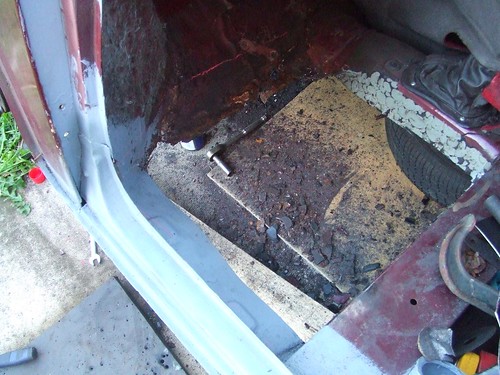
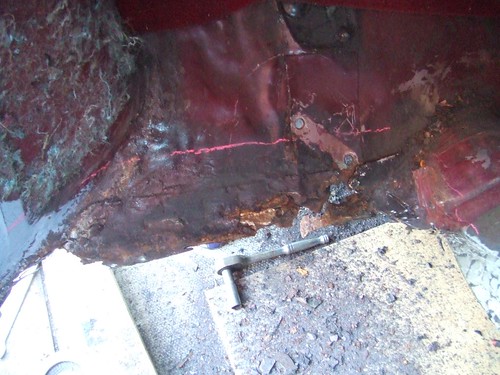
I started to cut out the front floorpans today since they were pretty rusty.

The passenger side needed entirely cut out, and there's rust around the lower subframe mount.

Thankfully I've got a complete panel to replace all of this so it should take too long.I had to remove the rigid fuel pipe as well since this runs under this side, I'll be replacing that with a new one.

The floor cut out

Rust around the lower subframe mount