No Mini action for a week or two as I have tendonitis in my arm and can't do anything physical with it :(
Should be back on track in a week, fingers crossed...
Sunday 12 October 2008
Monday 29 September 2008
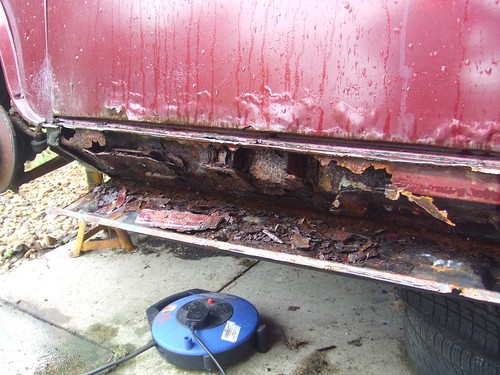
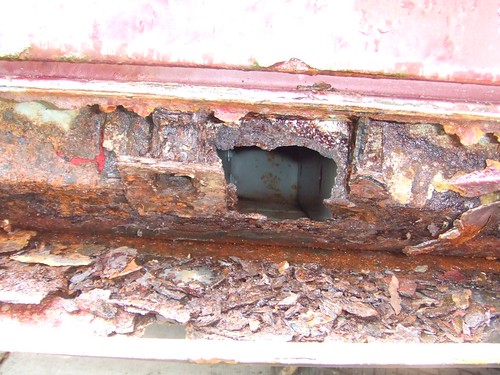
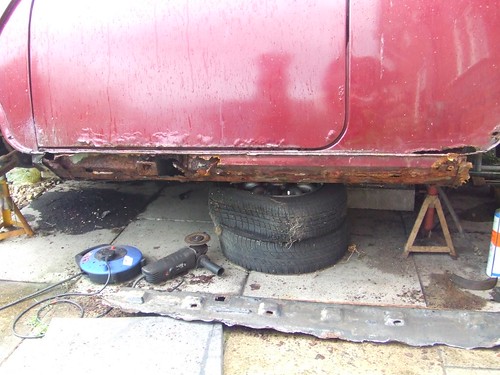
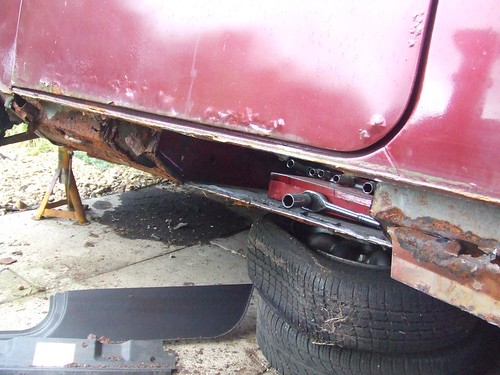
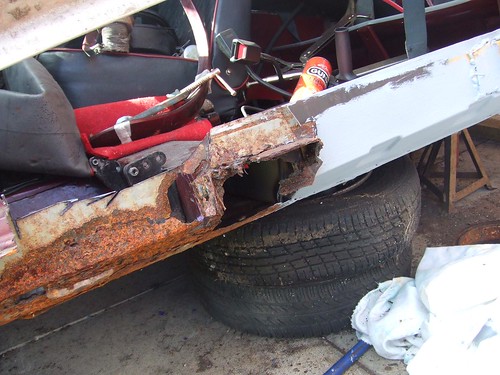
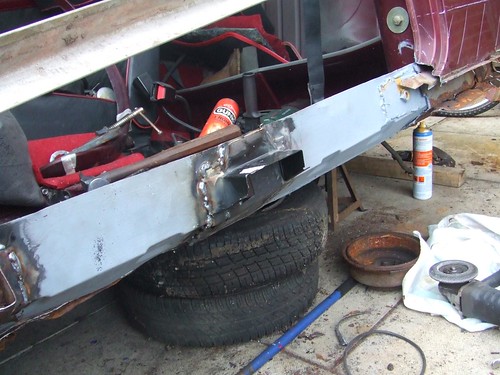
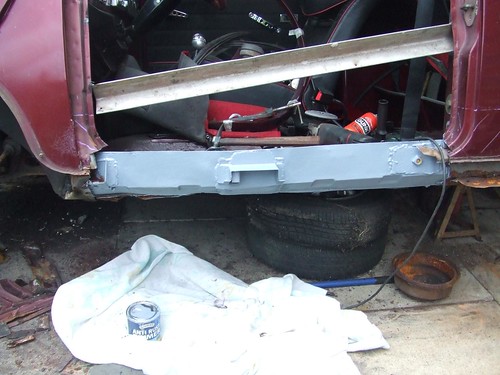
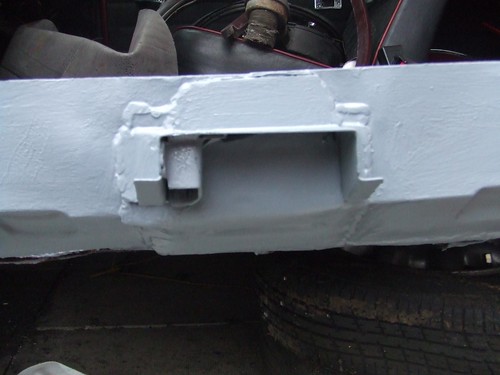
De-seaming progress
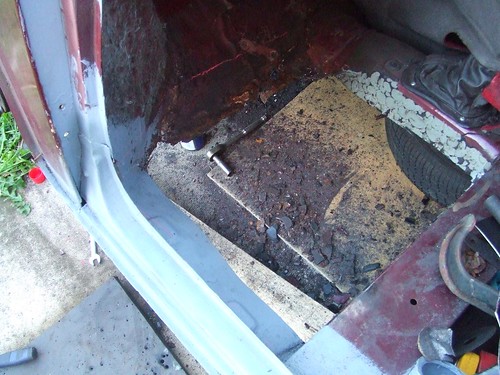
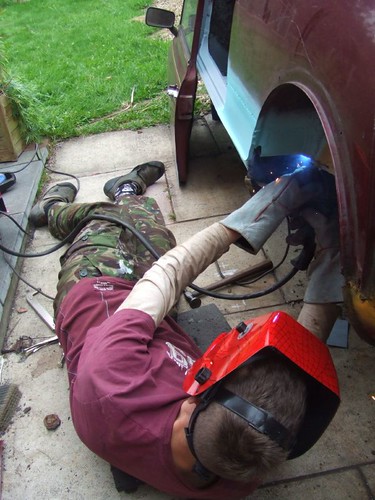
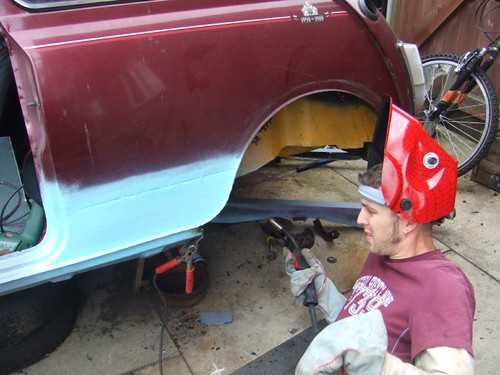
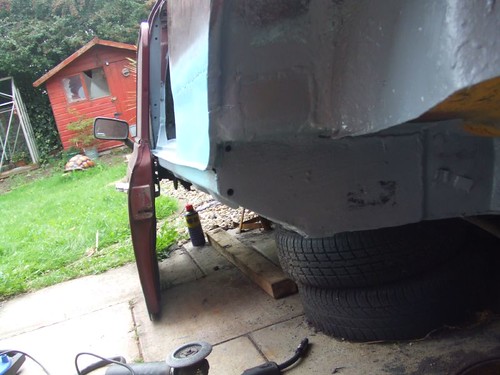
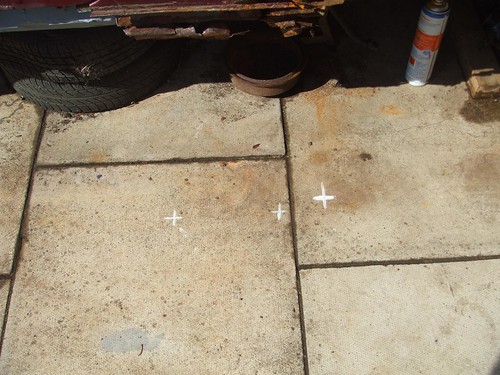
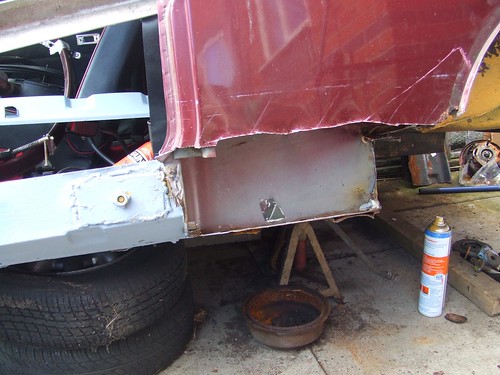
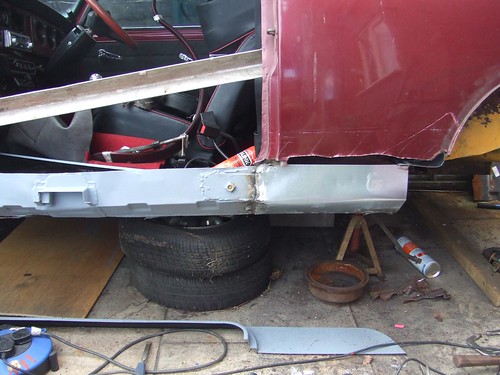
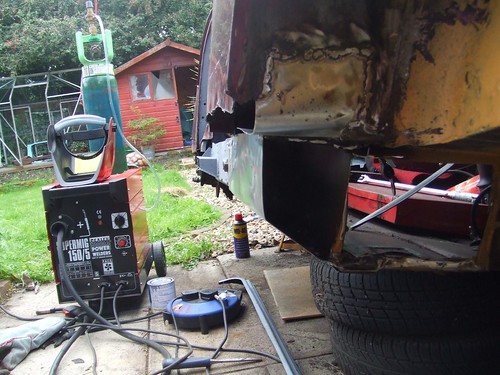
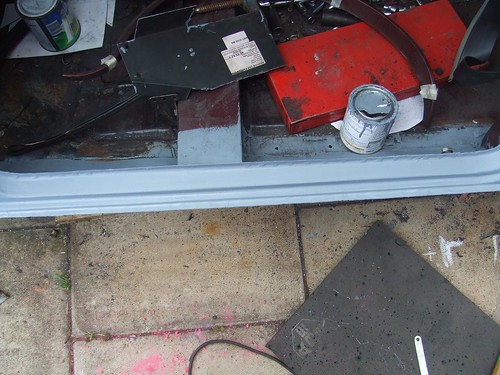
A bit more progress on the de-seaming of the rear this weekend. I've got 50% of the seam cutoff and welded up, just the other 50% to do and then the filling and prepping.
I plan on doing a more detailed post about this in the future, but briefly here's what's involved in deseaming a mini:
You need to do this very slowly and carefully to ensure that everything stays straight, and on no account cut the entire seam off in one go, otherwise your Mini will spring apart!
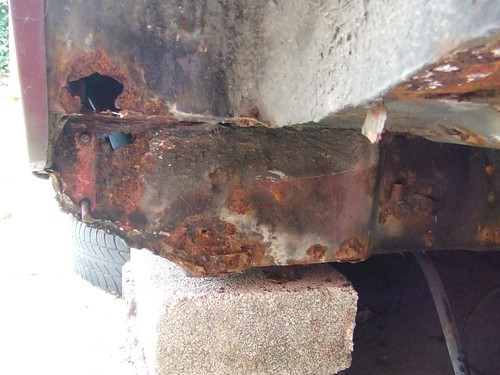
One of the problems I'm facing on my car is that when I removed the lip for the rear bumper the panels did not meet up; at the ends they were OK but in the centre the gap was as much as 5mm between the panels. Good old Austin build quality!
I plan on doing a more detailed post about this in the future, but briefly here's what's involved in deseaming a mini:
- Start from one end of the seam and cut off 6 inches of the seam using a cutting disc in a grinder. Do not cut off any more than 6 inches at this stage!
- Use a sanding disc in the grinder to smooth the stubs left from the seam until they are pretty much flush with the panel.
- You will now see 3 edges of steel, which you must carefully butt weld together. Pulse the welder and planish the welds with a planishing hammer after every pulse to avoid distorting the panel
- Once you have welded the 6 inches up, start again by cutting the next 6 inches away and welding as before.
- Continue this until you have removed and welded the entire seam
- Use a sanding disc on a grinder to sand the welds smooth, fill any additional holes with weld as you find them
- Use filler (bondo) / lead to smooth over the welds where the seam used to be and prepare for painting
You need to do this very slowly and carefully to ensure that everything stays straight, and on no account cut the entire seam off in one go, otherwise your Mini will spring apart!
One of the problems I'm facing on my car is that when I removed the lip for the rear bumper the panels did not meet up; at the ends they were OK but in the centre the gap was as much as 5mm between the panels. Good old Austin build quality!
Thursday 25 September 2008
Rear brakes - success!
My new tool arrived for fitting the e-clips on the rear brakes of the mini so I could finally get them built up.
Thankfully fitting the clips with the tool proved a to be a piece of cake, unlike trying to do it without it!
First you fit the e-clip to the tool, above the cone.

Next, you screw the tool into the brake line thread on the wheel cylinder and then tighten the nut on the tool. This forces the cup down over the cone, thus expanding the e-clip.

Keep tightening the nut and the clip gets forced over the wheel cylinder until it snaps into place in the groove on the cylinder.

Finally unscrew the tool from the brake line thread. Job done!

Sunday 21 September 2008
OS Rear Seatbelt Mount
Not much progress on the Mini this week, despite the sun, thanks to combined holiday and girlfriends birthday.
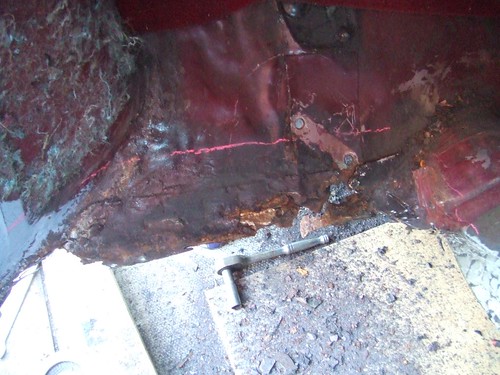
I did manage to get some work done on the rear seatblet mount which was a complete mess. Somebody had previusly bodged a repair to the rear wheelarch which had left the seatbelt mount in a dangerous state.

First I cut out a large portion of the damaged seat base

And then I welded in lots of new metal. I also had to seam weld the wheelarch in since the previous bodger had only tack welded it in!

Thursday 11 September 2008
Rear wheel cylinders
My new rear wheel cylinders arrived today, so I'd hoped to make a start in building up the rear brake backplates.
I hit a snag however. The rear wheel cylinders are held in place by circlips (e-clips actually) and they are practically impossible to fit.
I discovered that there's a special tool available to make fitting these easy, so I've ordered one. Hopefully things will go easier once that arrives...
Here's a picture of the nightmare e clip.

Wednesday 10 September 2008
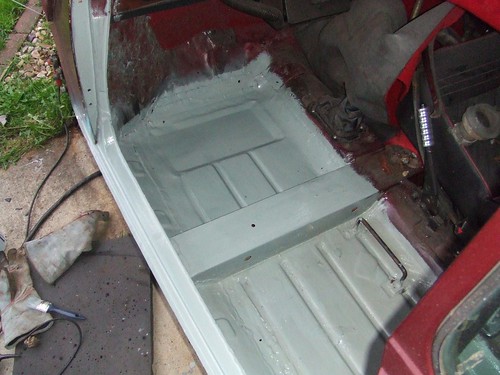
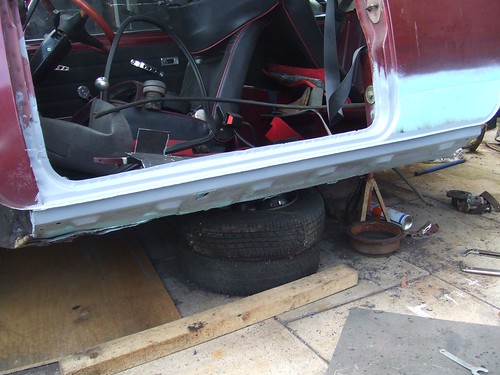
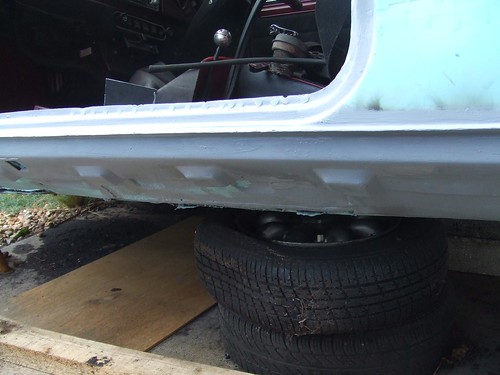
Passenger floorpan finished
I got the passenger floorpan finished and painted tonight - just the seam sealing to do, but I need to do the whole underside so I'll do that all at once.
That marks the end of the nearside, next job - the offside!

That marks the end of the nearside, next job - the offside!
Tuesday 9 September 2008
Passenger floorpan
Well I spoke too soon on my last post (about working outside). Just after posting that I went out and did a couple of hours on the passenger floorpan, half way through welding though the skies opened and absolutely soaked me, my welder (switched on :-S), all of my tools and the car.
I was pretty annoyed to say the least. In fact I threw my angle grinder as hard as I could at the car and then sat in the garden in the rain sulking for half an hour.
I've calmed down a bit now thankfully and got the passenger floorpan finished last night. It took quite a bit of welding as I also had to tidy up the area around the inner wing and the transmission tunnel. Once again it was too dark to take photos by the time I'd finished but I'll try to take some tonight.
That should mean that the nearside of the car is now finished. Next job is to start the offside, which is going to need at east as much work...
Saturday 6 September 2008
Restoring cars outdoors
Rebuilding a car outside can be a bit of a nightmare. For one thing, when you finish working you have to pack everything away and tidy up. For me that means dragging the welder and huge gas bottle to the shed, tidying all of my tools awy (and cleaning them) and then sweeping up. Plus you have to re-assemble any bits of the car you've taken apart (like the doors).
Added to that, it rains CONSTANTLY in England. That means work which looked nice and shiny and new one day starts to rust the next, and you often can't get much paint on things because of the damp.
Having said that, it is possible so long as you plan ahead and don't just strip the car down to nothing in one go.
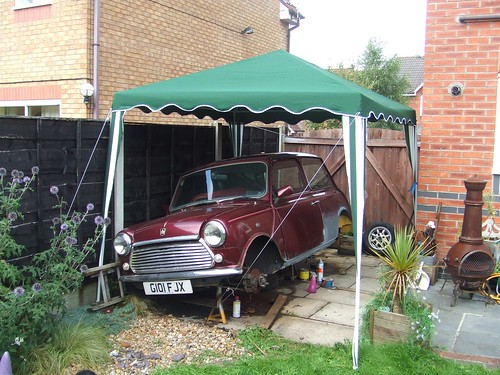
To make my life a little more bearable I put the Mini in a gazebo today. Let see how it goes...
Added to that, it rains CONSTANTLY in England. That means work which looked nice and shiny and new one day starts to rust the next, and you often can't get much paint on things because of the damp.
Having said that, it is possible so long as you plan ahead and don't just strip the car down to nothing in one go.
To make my life a little more bearable I put the Mini in a gazebo today. Let see how it goes...
Friday 5 September 2008

Thursday 4 September 2008
Floor and deseaming progress
After a few days of torrential rain I finally managed toget a bit of work done on the Mini tonight.
The front NS floor is now readyto go in, the repair panel took a lot of cutting to fit and I had to repair the lower front subframe moutning first. I should get the floorpan welded in tomorrow if the weather stays OK.
I also got another 6 inches of the rear bumper deseamed tonight.
No pictures today though as it was too dark to take any by the time I'd finished! (8:30pm - nights are drawing in...)
Tuesday 2 September 2008
Front NS Floors
I started to cut out the front floorpans today since they were pretty rusty.
The passenger side needed entirely cut out, and there's rust around the lower subframe mount.
Thankfully I've got a complete panel to replace all of this so it should take too long.I had to remove the rigid fuel pipe as well since this runs under this side, I'll be replacing that with a new one.
The passenger side needed entirely cut out, and there's rust around the lower subframe mount.
Thankfully I've got a complete panel to replace all of this so it should take too long.I had to remove the rigid fuel pipe as well since this runs under this side, I'll be replacing that with a new one.
Sunday 31 August 2008
Rear subframe mount
Today I got the job that started all of this finished - the rear subframe mounting.
After taking the panel in and using my home-made jig to align everything, all that was left was to seam weld the panel and clean it up and paint it. Actually I also had to make numerous repairs to the rear wheelarch...
Here I am welding the panel in place.
It's hard work welding on your back! (And you get burned a LOT).
And here's the final result
It just needs tidying up and painting and then it's done. Compare that with how it started!
Next job, repair the front floor.
Thursday 28 August 2008
Rear subframe jig
In order to ensure that he subframe mountings line up when I fit the new subframe mounting panels, I decided to make a jig which I could use to align everything prior to welding.
Firstly I measured (three times to be sure) the distance between the rear trunnions on the old subframe. This distance was 1285mm. I then cut up an old piece of angle iron to the exact length (minus the width of the trunnions) and then welded a pair of old trunnions onto each end of this. I double checked that the new jig matched up exactly with the old subframe and thankfully, it did.
Here's the jig:

I then measured and tacked the new subframe moutning in place, and checked that it aligned with the otherside using the jig, like this:

Luckily everything seems to have lined up first time! I was pretty worried about doing this, but it seems to have gone well...
Wednesday 27 August 2008
New brake backplates
Not much to report today, other than the purchase of some replacement backplates for the rear brakes.
As is common on the Mini, the handbrake adjusters had completely seized on all of my other backplates and rather than mess about trying to free them off I picked up this pair on ebay for £10.

As is common on the Mini, the handbrake adjusters had completely seized on all of my other backplates and rather than mess about trying to free them off I picked up this pair on ebay for £10.

Tuesday 26 August 2008
Door step and outer sills
The next job after the inner sills was the door step. This required a lot of care to make sre everything lined up when I fitted the new panel, so the first thing was to take lots of measurements. I made alignment marks both on the car and on the ground and then measured the distance to them from the old metal.
Next I started to cut away the old rear bins and make up repair sections. Quite a lot of metal had to come out!
And then repair sections were let in
With thatdone I could start letting in the new door step and rear quarter. Here it is tacked in place
Thankfully all of my measuring paid off as it all lined up perfectly!
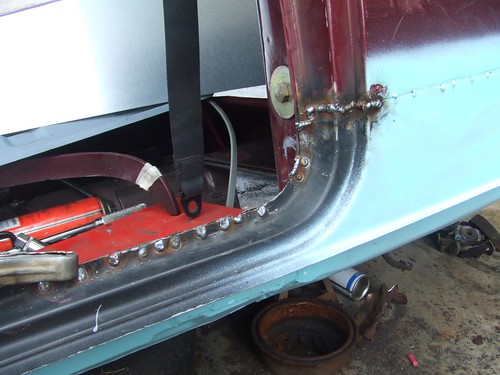
The door step was plug welded and seam welded in place. I butt welded it to the rear quarter panel.

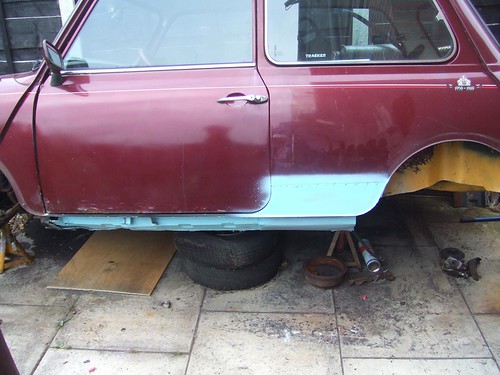
The new door step in place, next job - the outer sill!
The outer sill was very easy after the hard work of the inner sill and door step. It just plug welds to the doorstep and the floors, so I just had to position it correctly and then plug weld it.
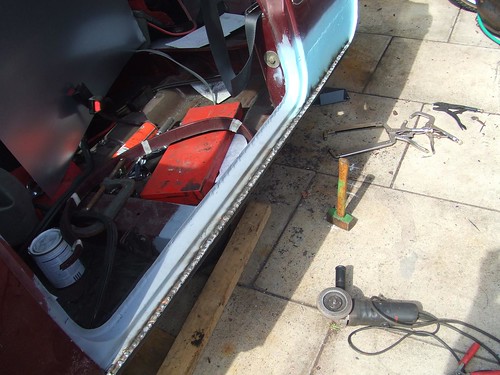
In this photo you can see how many plug welds I had to do to the outer sill. (Lots).
Next it's just a case of sanding the welds down and priming it, like this
And job done!
Next I started to cut away the old rear bins and make up repair sections. Quite a lot of metal had to come out!
And then repair sections were let in
With thatdone I could start letting in the new door step and rear quarter. Here it is tacked in place
Thankfully all of my measuring paid off as it all lined up perfectly!
The door step was plug welded and seam welded in place. I butt welded it to the rear quarter panel.
The new door step in place, next job - the outer sill!
The outer sill was very easy after the hard work of the inner sill and door step. It just plug welds to the doorstep and the floors, so I just had to position it correctly and then plug weld it.
In this photo you can see how many plug welds I had to do to the outer sill. (Lots).
Next it's just a case of sanding the welds down and priming it, like this
And job done!
Monday 25 August 2008
Inner sills
I hadn't planned on replacing the sills, but once I started looking it was clear they needed doing.
Somebody in the past had fitted cover sills - 8" wide sills which are just welded over the top of the old (rusty) sills. If you have a Mini do not do this!!! - it might keep your car on the road for another year but behind those sills the real (structural) sills will be rotting away.
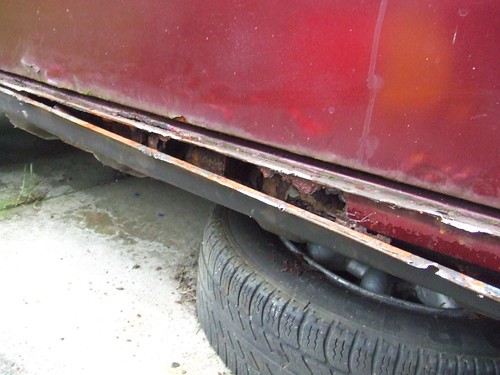
I removed the cover sills first. Woohoo! No rust! Oh no wait, I think I can see a bit.
The "real" outer sills were almost completely gone, and the jacking point was dust. It's a good job no one tried to jack the car up on this
The cover sills completely removed, showing the extent of the rust
The first job is to cut the old inner sills out. I just cut these out using a cutting disc in the grinder since I would be replacing everything.
I replaced the inner sills in two halves, just to make the job a little easier and to make sure I didn't remove too much metal at once.
With the old sills removed and the new ones in place, the next job was to replace the jacking point. I bought a heritage jacking point panel and seam welded this in place. I could have plug welded it but since I'llbe jacking the car up on this I thought it much better to seam weld it. Plug or spot welds will eventually start to seperate the panels thus allowing water in, much better to just seal it all.
I also cut the old seatbelt mounting off the old sill and seam welded that onto the new inner sills.
That's better! The new inner sills just about in place. The next job is to look at the rear "bins" and the door step panel.
You'll also notice that I've welded a bar across the door gap, this is to ensure that the door gap doesn't collapse with the sills removed.
Somebody in the past had fitted cover sills - 8" wide sills which are just welded over the top of the old (rusty) sills. If you have a Mini do not do this!!! - it might keep your car on the road for another year but behind those sills the real (structural) sills will be rotting away.
I removed the cover sills first. Woohoo! No rust! Oh no wait, I think I can see a bit.
The "real" outer sills were almost completely gone, and the jacking point was dust. It's a good job no one tried to jack the car up on this
The cover sills completely removed, showing the extent of the rust
The first job is to cut the old inner sills out. I just cut these out using a cutting disc in the grinder since I would be replacing everything.
I replaced the inner sills in two halves, just to make the job a little easier and to make sure I didn't remove too much metal at once.
With the old sills removed and the new ones in place, the next job was to replace the jacking point. I bought a heritage jacking point panel and seam welded this in place. I could have plug welded it but since I'llbe jacking the car up on this I thought it much better to seam weld it. Plug or spot welds will eventually start to seperate the panels thus allowing water in, much better to just seal it all.
I also cut the old seatbelt mounting off the old sill and seam welded that onto the new inner sills.
That's better! The new inner sills just about in place. The next job is to look at the rear "bins" and the door step panel.
You'll also notice that I've welded a bar across the door gap, this is to ensure that the door gap doesn't collapse with the sills removed.
Sunday 24 August 2008
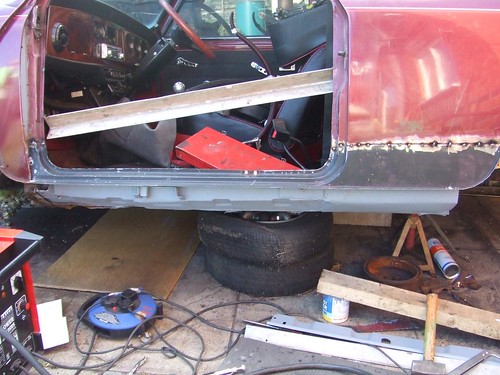
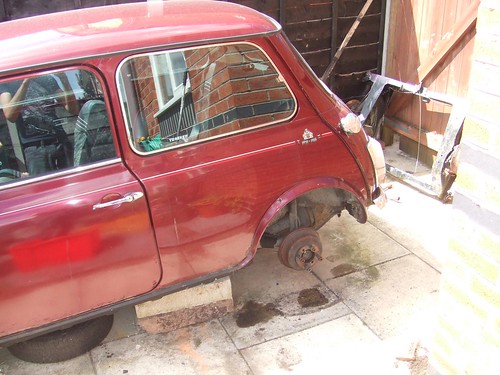
Rear Subframe Removal
Before I start, let me say that removing the rear subframe was a nightmare. Don't let anyone tell you it's a quick job unless all of your mounting bolts are nicely clean, rust free and greased! You're going to need patience and a big extension bar for your socket to get it off!!
Anyway, here's the car ready to have the subframe removed:
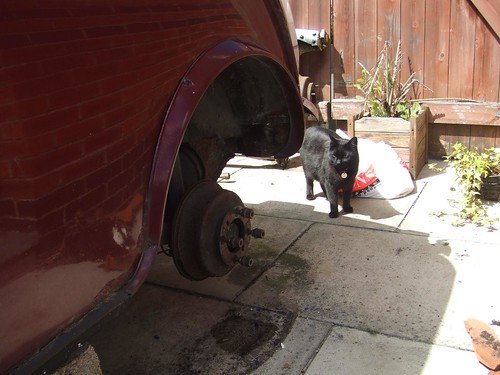
Cheepa wanted to double check I was doing things right:
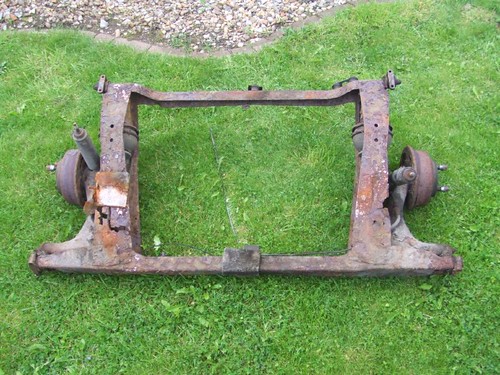
After much soaking of the bolts in WD40, and much cursing the old bolts sheared off anyway and I finally got the subframe removed:
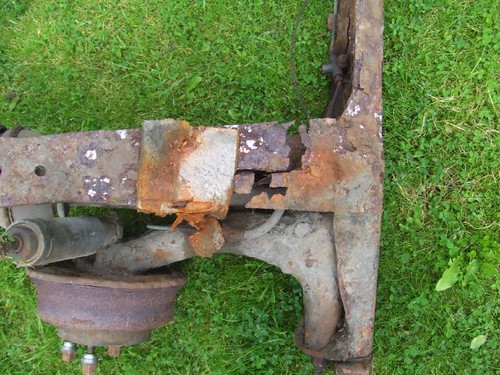
It's pretty knackered as you can see.
Check out these splits!
With the subframe off I could asses how much work was needed before I could put the new one on. The answer, a lot. Here's the N/S subframe mount for starters:
Anyway, here's the car ready to have the subframe removed:
Cheepa wanted to double check I was doing things right:
After much soaking of the bolts in WD40, and much cursing the old bolts sheared off anyway and I finally got the subframe removed:
It's pretty knackered as you can see.
Check out these splits!
With the subframe off I could asses how much work was needed before I could put the new one on. The answer, a lot. Here's the N/S subframe mount for starters:
Introduction
Welcome to my Mini restoration blog.
The car is a 1989 Mini 30 owned by my girlfriend. When she got it it looked like it "just" needed a new rear subframe... however once I removed the subframe and started looking I just found more and more rot, so I thought I'd better get on with fixing it all since we're supposed to be moving soon, which is tricky when the car has no rear wheels!
The plan is to repair all of the rust first. I've got a new rear subframe ready to be built up and fitted so we'll rebuild the rear radius arms and brakes and then fit that, with HiLos and new adjustable dampers instead of the old fixed suspension. I'm going to deseam the rear bumper mount and then the car is being sprayed red/gold flip. We're looking at deep dish chrome wheels to finish it off.
Here's a photo of our cat Chiho sitting on it just before I started work:
I've rebuilt a few other cars in the past so hopefully there won't be too many suprises, but the Mini is a lot smaller than some of my other cars! My Citroen DS Restoration website has lots of photos of my other cars.
Subscribe to:
Posts (Atom)

