Showing posts with label subframe. Show all posts

Sunday, 24 May 2009

Back to the grindstone

Hard to believe that it's been 8 months since any Mini action, but after the RSI-induced welding ban and the endless English rain I didn't get much opportunity to work on the car.

Well today we started again, it was sunny for a change so we decided to press on with the rebuild. Today my angle grinder broke and I'd run out of sandpaper so any bodywork was out of the question, so instead we decided to get the new subframe ready for build-up and refit.

It needed a new coat of paint first, so after much umming and ahhing we opted for a bright shade of Ferrari red.

Now it's nice and shiny :-) Next job is to rebuild the rear arms and fit the rebuilt brakes, by which time I might even have got the rear of the bodyshell ready to fit it!
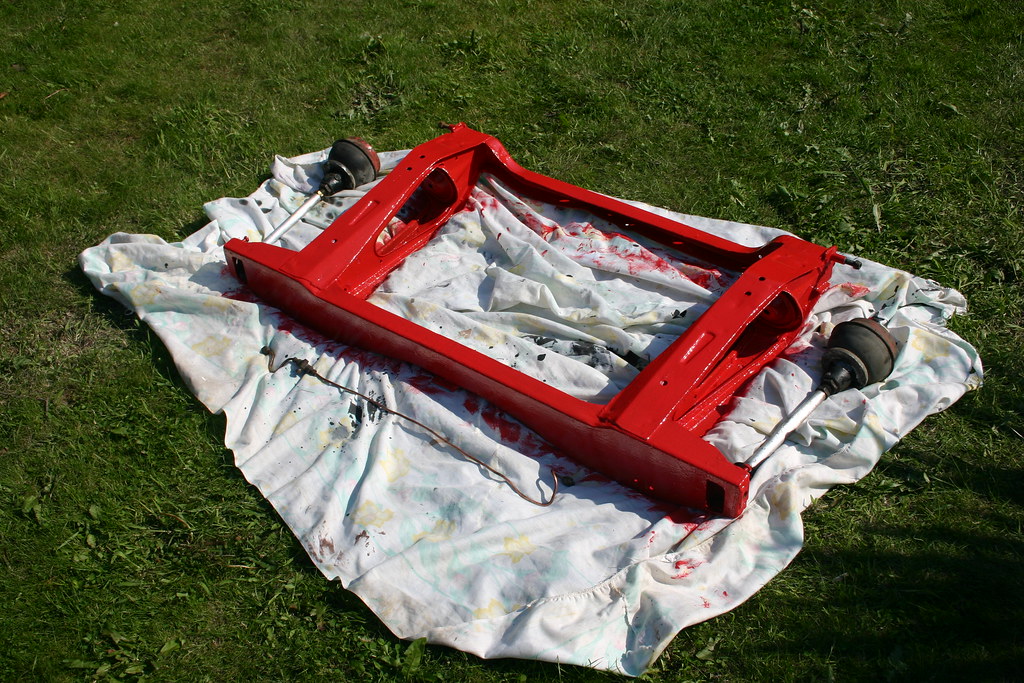
Red subframe

Sunday, 31 August 2008

Rear subframe mount

Today I got the job that started all of this finished - the rear subframe mounting.

After taking the panel in and using my home-made jig to align everything, all that was left was to seam weld the panel and clean it up and paint it. Actually I also had to make numerous repairs to the rear wheelarch...

Here I am welding the panel in place.
Welding

It's hard work welding on your back! (And you get burned a LOT).

Looking tired

And here's the final result

The rear subframe mount repaired

It just needs tidying up and painting and then it's done. Compare that with how it started!

Rusty subframe mount

Next job, repair the front floor.

Thursday, 28 August 2008

Rear subframe jig

In order to ensure that he subframe mountings line up when I fit the new subframe mounting panels, I decided to make a jig which I could use to align everything prior to welding.

Firstly I measured (three times to be sure) the distance between the rear trunnions on the old subframe. This distance was 1285mm. I then cut up an old piece of angle iron to the exact length (minus the width of the trunnions) and then welded a pair of old trunnions onto each end of this. I double checked that the new jig matched up exactly with the old subframe and thankfully, it did.

Here's the jig:


I then measured and tacked the new subframe moutning in place, and checked that it aligned with the otherside using the jig, like this:


Luckily everything seems to have lined up first time! I was pretty worried about doing this, but it seems to have gone well...

Sunday, 24 August 2008

Rear Subframe Removal

Before I start, let me say that removing the rear subframe was a nightmare. Don't let anyone tell you it's a quick job unless all of your mounting bolts are nicely clean, rust free and greased! You're going to need patience and a big extension bar for your socket to get it off!!

Anyway, here's the car ready to have the subframe removed:

Mini with its wheels off

Cheepa wanted to double check I was doing things right:

Chiho and the mini

After much soaking of the bolts in WD40, and much cursing the old bolts sheared off anyway and I finally got the subframe removed:

Old subframe

It's pretty knackered as you can see.

Check out these splits!

Split subframe

Split subframe

Split subframe

With the subframe off I could asses how much work was needed before I could put the new one on. The answer, a lot. Here's the N/S subframe mount for starters:

Rear subframe mount